The world of modern cosmetics is continuously evolving. Even if you’ve been applying makeup all your life, it can be hard to keep up with products and trends as they come out. Contouring is a semi-new—or at least new to the masses—makeup technique that really caught on over the last few years.
At this point, I definitely wouldn’t call contouring a trend, nor would I say it’s contemporary. Time will tell, of course, but the flattering, customizable makeup technique is loved by so many that I predict it’s here to stay.
What Is Contouring, Exactly?
Contouring is a makeup approach in which you use products slightly darker and lighter than your natural skin tone to add dimension and achieve a sculpted appearance. Essentially, the goal is to create various optical illusions on the face, neck, and décolletage.
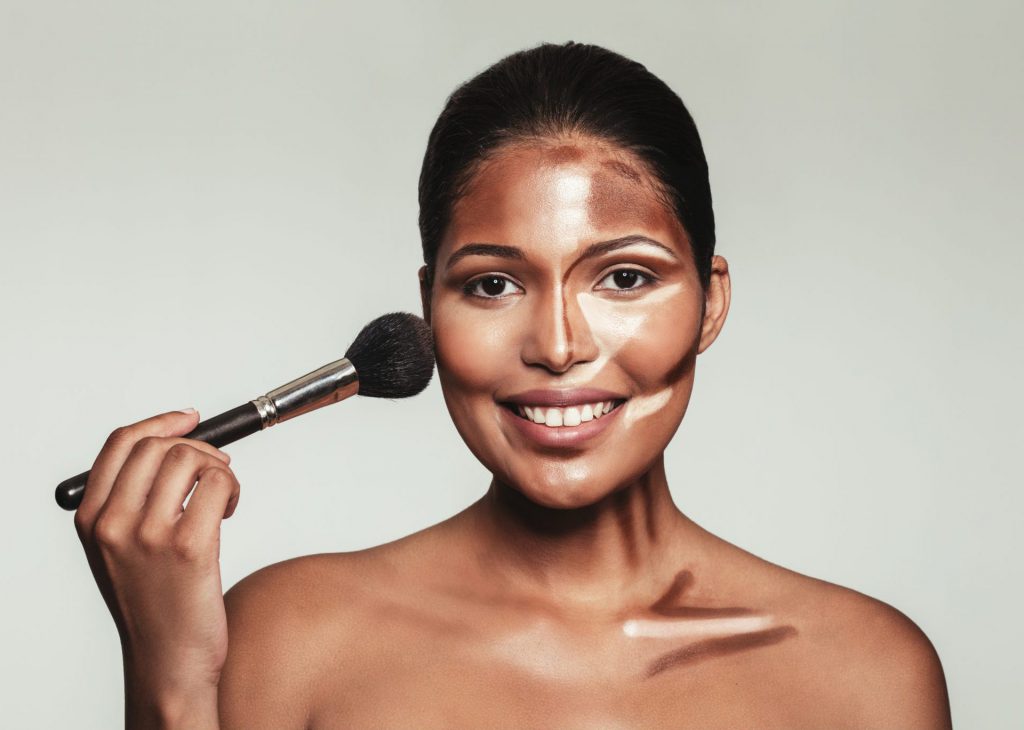
For instance, you can use a darker color on the hollows of your cheeks to make your cheekbones appear more prominent. You can contour your nose to make it look straighter or narrower, your neck to make your face appear slimmer, or your forehead to make it seem smaller. And then you can use a lighter color to highlight your best features. The possibilities are truly endless.
I’m here to tell you that contouring doesn’t have to be reserved for special occasions. Why? For one, it’s not actually that hard, and it doesn’t have to take a lot of time. And believe it or not, you can contour with just one or two affordable products.
Follow these tips to implement contouring into your daily routine. Before long, it’ll be as quick and easy as applying foundation.
Selecting Your Color
First, you’ll want to find the right color. Virtually all cosmetic companies, including drugstore brands, are now on the contour bandwagon, so it’s not hard to find products at every price point.
For contouring, look for a color that’s one to two shades darker than your complexion. Then select a highlighter that’s one or two shades lighter than your natural skin tone. Consider whether your skin is warm, cool, neutral, or olive, and try to find products in complementing colors.
Here’s a cheat sheet:
Warm: Gold, yellow, and sometimes red undertones
Cool: Blue and sometimes green undertones
Neutral: Blue, red, and yellow undertones
Olive: Yellow and green undertones
Some products come in powder form, while others are creams. If you want a matte finish, opt for powder, and for a dewy look, go for cream. That said, powders can usually be applied and blended quicker than creams, which is convenient for everyday makeup.
Also, you can use makeup products that aren’t explicitly designed for contouring. For example, you can contour with a powder bronzer or a foundation stick that’s darker than your skin. Similarly, you can highlight with a lighter shade of concealer. While you’re at it, pick up a couple blending brushes or makeup sponges.
The Basic Steps
While everyone’s contouring routine will look different, the basic steps are usually the same. Here’s what you do:
1. Do Your Base
Apply foundation as you normally would.
2. Sculpt
Take your contour color and draw semi-thick lines in the areas you want to create a sculpted effect. Don’t blend anything just yet.
3. Highlight
Go in with your lighter shade, applying it anywhere you want to highlight. You don’t have to “color in” any areas entirely, as blending will merge your lines together. (Steps two and three can be flipped.)
4. Blend
Blend, my friend. After mapping out your face with your contour and highlighter colors, take a medium angled brush or a makeup sponge and blend, blend, blend everything together.

Blending is the key to success with contouring, as it’s where your masterpiece will really come together. Instead of rubbing the products into your skin, you’ll either buff in circular motions using a brush or gently tap with a sponge.
You can’t really over-blend, but you can definitely under-blend, so don’t skimp on this step. This probably goes without saying, but the less product you use, the quicker the blending process will be.
5 Dust.
Using a large soft brush, lightly dust a translucent setting powder over your entire face, neck, and décolletage.
Working It into Your Daily Routine
At first glance, this might seem like a lot of steps. However, you can do a simple, everyday contour in about five minutes. And the more you practice, the faster you’ll be.
When I’m short on time or just want a subtle contoured look, I’ll stick to two or three areas. This usually includes my nose and upper forehead. I have a somewhat large forehead, and contouring this area draws the focus down to my eyes and mouth. Then I’ll highlight underneath my eyes and between my eyebrows, fanning the color out onto my lower forehead.
When I want a little more oomph, I’ll add contour to the hollows of my cheeks to create the illusion of higher cheekbones. I also like to contour around my temples and my neck to make my face look slimmer. Then I’ll bring my highlighter down into a point underneath my eyes. I’ll also draw a line down the bridge of my nose and apply it along my lower jawline.If you’ve got a few extra minutes to spare, you might work in a couple more areas. But if you don’t have time to fit in any contouring some days, don’t sweat it!